

Key takeaways
- Remove ash before it reaches the lower intake openings; blocked airflow is a major cause of smoky fires.
- Do not pour water on a hot steel insert unless an emergency requires it. Thermal shock can warp metal and crack coatings.
- Inspect welds, legs, air holes, and the spark screen at the start of every season.
- Keep stainless and carbon-steel parts dry between uses. Store removable pieces under cover rather than inside a damp pit.
- Do not overload a secondary-burn chamber above its recommended fill line; logs can block upper jets and push flames over the rim.
- Replace a grate when bars are visibly sagging, cracked, or thin enough to drop burning wood into the ash bed.
The best wood burning kits are size-matched, stainless-steel or heavy-gauge carbon-steel systems with a raised fire grate, adequate air intake, and a spark screen; for most outdoor fire pits, a purpose-built smokeless insert is safer and more efficient than trying to convert a propane burner pan.
“Wood burning kit” can mean several different products: a replacement grate and ash pan for an existing wood pit, a secondary-burn insert for a masonry opening, or a conversion package intended to remove a gas burner and install a solid-fuel firebox. These categories are not interchangeable. Before buying, measure the opening, check the pit manufacturer’s fuel rating, and confirm that the bowl or surround is designed for repeated high heat.
Our top picks


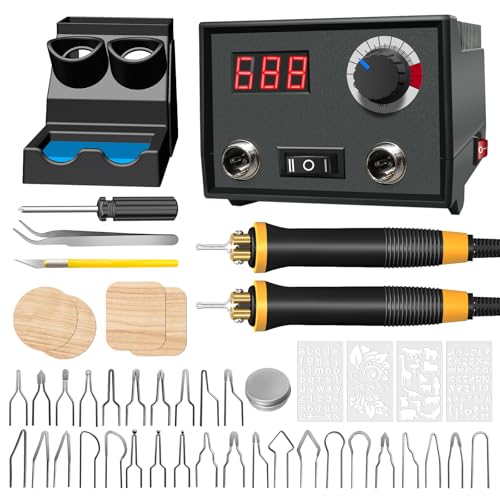

As an Amazon Associate we earn from qualifying purchases at no extra cost to you. Ratings are shown as listed on Amazon.
Best wood burning kits by situation
| Situation | Best kit type | Useful specifications | Why it fits |
|---|---|---|---|
| Occasional fires on a modest budget | Raised grate with ash pan and spark screen | 18–24 inch diameter; 12–16 gauge steel; 10–25 lb | Lowest cost and simplest setup, though it will not eliminate smoke |
| Frequent use in a patio fire pit | Double-wall secondary-burn insert | 20–30 inch diameter; 304 stainless steel; 25–55 lb | Better airflow and less visible smoke after the fire is hot |
| Existing masonry or steel fire ring | Custom-sized insert with riser and removable ash tray | 2–4 inch clearance around the insert; 3–6 inch air gap underneath | Uses the existing surround while controlling combustion inside the insert |
| Replacing a propane or natural-gas burner | Manufacturer-approved solid-fuel conversion, or a separate wood-burning bowl | Written fuel approval; noncombustible base; screened enclosure | Avoids trapping heat around gas valves, hoses, and burner components |
| Large groups and long burns | Heavy-gauge open grate or large secondary-burn system | 28–36 inch diameter; 10–12 gauge steel or 304 stainless; 45–90 lb | Holds larger splits and resists distortion, but needs more clearance and fuel |
Head-to-head: open grate versus smokeless insert
Raised grate and ash-pan kits
An open grate lifts logs above the base so air can reach the underside of the fire. This is the right choice when your priority is low price, easy loading, and compatibility with a broad range of bowls. A grate also keeps logs out of accumulated ash, making it easier to maintain a steady flame.
The trade-off is smoke. An open grate supplies primary combustion air but usually does not re-burn the unburned gases leaving the fire. It can reduce smoldering compared with logs lying directly on the floor, but it is not a true smokeless system. Look for welded legs, a removable ash pan, and enough clearance that hot ash cannot sit against a thin bowl.
Double-wall secondary-burn kits
A secondary-burn insert uses a perforated inner wall and an outer air channel. As the fire heats the insert, air enters through the lower openings, warms between the walls, and exits near the top. Those upper jets can ignite some smoke-producing gases before they leave the firebox.
This design can produce much less visible smoke once the fire is established, but it cannot make wet wood clean-burning. It also demands correct loading: tightly packing the chamber, using oversized logs, or restricting the lower intake can lower temperatures and increase smoke. Stainless steel generally costs more but handles repeated heating and cooling better than thin painted steel.
What to compare before buying
Compatibility and dimensions
Measure the smallest opening, not the outside diameter of the decorative surround. Allow room for thermal expansion and airflow. A useful target is at least 2 inches of clearance around an insert and 3–6 inches beneath it where the design requires under-fire air. The kit must also sit level; a tilted insert can send logs or embers toward the rim.
Do not assume a gas fire pit can become a wood fire pit by removing the burner. Gas models may contain valves, supply lines, ignition wiring, drainage paths, glass media, or heat-sensitive finishes that are unsuitable for solid fuel. A conversion is acceptable only when the manufacturer explicitly supports it or when a qualified professional has evaluated the entire assembly.
Steel thickness and construction
For occasional use, 14–16 gauge steel can be adequate if the grate is well supported and protected from standing water. Frequent burning favors 10–12 gauge carbon steel or 304 stainless steel. The first parts to fail are commonly thin grate bars, tack-welded legs, and the lower edge of a burn insert where ash and moisture collect.
Stainless steel resists rust and is easier to leave outdoors under a cover, but it can discolor and develop heat-related warping. Carbon steel develops surface rust unless seasoned, painted with high-temperature coating, or stored dry. Avoid ordinary galvanized steel inside the firebox: heating zinc-coated metal can release hazardous fumes.
Ventilation and smoke control
Count the lower intake openings and inspect whether they can become blocked by ash. A good kit provides a clear path from the outside of the fire pit to the fuel bed and, in a secondary-burn design, a separate path to the upper jets. Decorative solid-sided surrounds may look attractive but can starve the fire if they cover the intake holes.
Smoke reduction depends more on fuel and airflow than on the word “smokeless” in a product description. Burn seasoned wood with moisture content near 20 percent or lower, split into manageable pieces. Start with dry kindling, establish a hot base, and add smaller splits before larger ones. Never burn painted, treated, glued, or construction wood.
Setup: a safer, more efficient installation
- Confirm the fuel rating. Read the fire pit manual and remove gas components only if solid-fuel use is approved.
- Measure the opening and base. Check diameter, depth, rim clearance, and whether the surface is noncombustible and level.
- Install the riser or grate. Keep the fuel elevated so primary air can reach the underside and ash has somewhere to fall.
- Check ventilation. Make sure intake holes are outside the ash zone and are not covered by a liner, cover, or decorative stones.
- Build a small, hot fire first. Use dry kindling and two or three small splits. A large cold load often smolders instead of reaching secondary-burn temperature.
- Fit the spark screen. Use a properly sized screen whenever embers could travel, and keep people, furniture, roofs, and vegetation outside the manufacturer’s clearance distances.
- Let the system cool completely. Ash can remain hot for many hours. Store it in a lidded metal container placed away from buildings and combustible materials.
A simple ownership calculation
Suppose a 24-inch secondary-burn insert costs $250–$500 and is used twice a month for four months of the year. Over three years, that is 24 fires. The insert cost alone works out to about $10–$21 per use before wood and maintenance. A $75 open grate used on the same schedule costs roughly $3 per use, but the difference may be offset if the more efficient insert burns less wood and makes the patio more comfortable during normal use.
Fuel efficiency is not just about the amount of wood consumed. A system that reaches a hot, stable burn can provide more useful heat with less smoky restart time. In practice, however, wood moisture, wind, loading technique, and pit location often matter more than small differences between similarly designed inserts.
Maintenance and common mistakes
- Remove ash before it reaches the lower intake openings; blocked airflow is a major cause of smoky fires.
- Do not pour water on a hot steel insert unless an emergency requires it. Thermal shock can warp metal and crack coatings.
- Inspect welds, legs, air holes, and the spark screen at the start of every season.
- Keep stainless and carbon-steel parts dry between uses. Store removable pieces under cover rather than inside a damp pit.
- Do not overload a secondary-burn chamber above its recommended fill line; logs can block upper jets and push flames over the rim.
- Replace a grate when bars are visibly sagging, cracked, or thin enough to drop burning wood into the ash bed.
Final buying recommendation
Choose an open grate and ash pan if you want the least expensive upgrade for occasional fires and accept normal smoke. Choose a double-wall stainless insert if you burn frequently and care about cleaner combustion, faster heat-up, and easier ash management. For any existing propane or natural-gas feature, do not improvise: buy only a documented solid-fuel conversion or use a separate wood-burning fire pit. Correct fit, dry wood, unobstructed ventilation, and a durable grate matter more than decorative accessories or an unusually low price.




Write Your Review
No reviews yet. Be the first to share your experience!